I asked Jody to make this Dryer Vent Fall Pumpkin craft for me because it reminds me of someone special in my life. When I was about 13 years old, there was a teacher that took me under her wing at school. I helped her set up her classroom, go visit some kids that had struggles, and even deliver items we had collected for donations. She was a wonderful woman who made a huge impact on me and my life.
One day right before school started, we stopped by her house after making some deliveries, and she showed me this fun craft she was making to sell at the local arts and crafts fair the following month. It was an adorable pumpkin centerpiece made from dryer vents. I went home and made a few with my mom. So now every time I see one, I think of her. I am so glad that Jody enjoyed making these for us and now I'll let her share how to make one of your own!
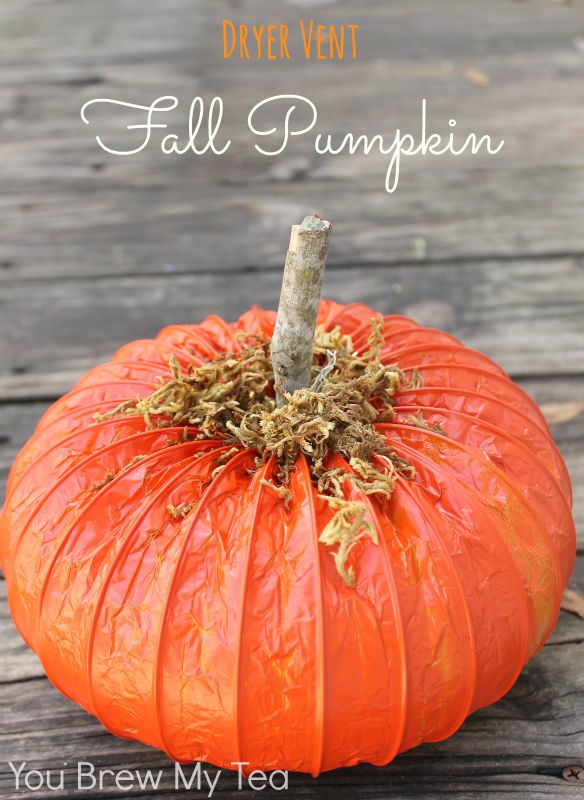
Dryer Vent Fall Pumpkin
This post may contain affiliate links.
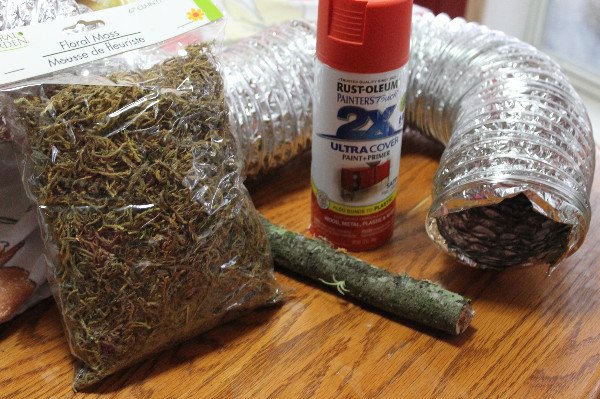
Supplies:
orange spray paint
craft moss
thick stick from the yard
wire cutters
 Directions:
Stretch out dryer vent to full length, for easier painting I clipped either end on a pant hanger and hung it from a tree.
Spray a light coat over length of the vent to give it a good tack coat, dry for 5 minutes.
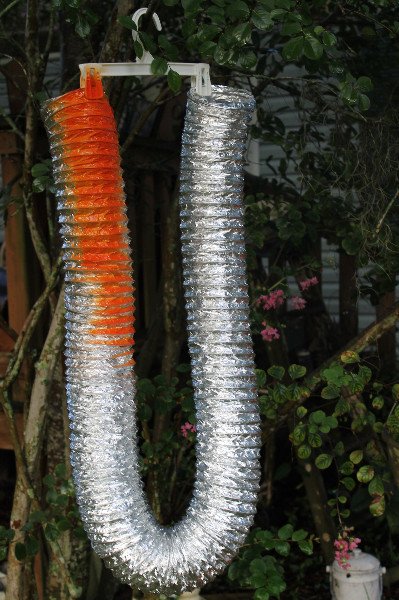
Apply 2-3 additional coats to cover well-Don't worry if you miss a few spots, you can give it a final touch up after assembling.
Dry for 1 hour.
Cut dryer vent into desired length to make a pumpkin as large or small as you want, you can get an idea by drawing the vent coil into a circle. You will need wire cutters to cut through the wire coiling through the vent.
With a hot glue gun apply a quick generous bead of glue halfway around one side, press the other end into it and hold in place until cook with clothespins. Repeat on the other half.
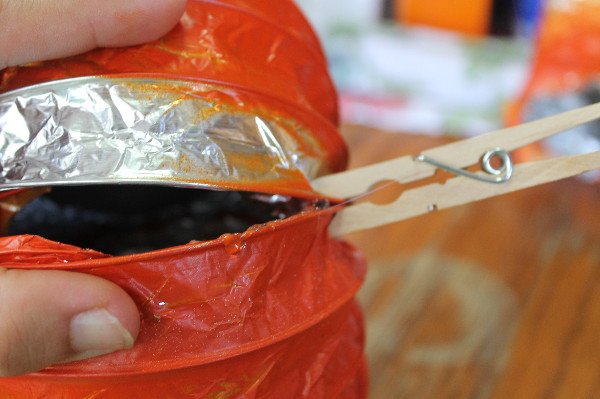
At this point if you have foil showing you can touch it up with paint again. Let it dry completely before adding the final touches. Adjust the coils to create a good shape for your pumpkin.
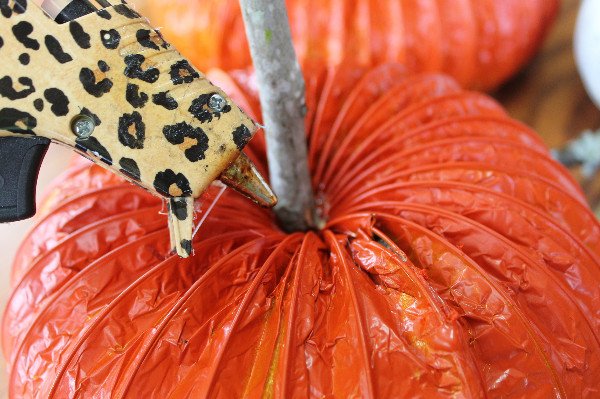
Place a generous amount of hot glue in the center of the top of pumpkin and press short stick into it for a stem. You may wish to add a bit more around it to secure.
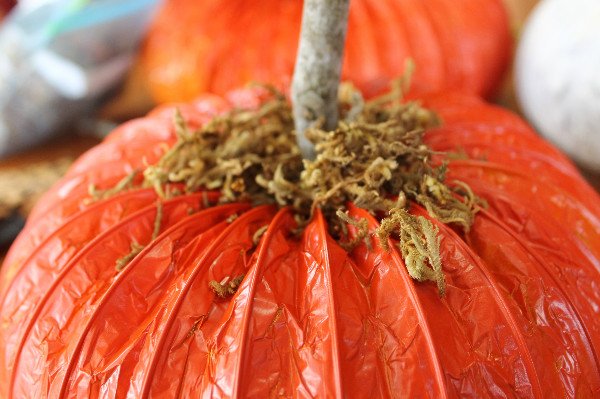
Top with moss to give it a bit more texture, imitate leaves, and make it a bit more realistic (maybe a little bit country).
 I did not shop around much, my dryer vent cost about $11, you can probably find it cheaper especially if you look for coupons to Home Depot and other stores through CouponSherpa.com. Since I was able to make three pumpkins from one I thought it was still a great value for such a cute DIY. I just love how it turned out, I gave one to my mother in law, and another to a friend but you could create a pretty grouping of them for yourself on a mantle or table.

As you can see, this is a wonderful easy craft just in time for Halloween! This can be done with help from your kids, and use as a table centerpiece, gift for teachers or displayed on your mantle!
Check out our other favorite Fall & Halloween crafts!
Frankenstein Upcycled Tin Cans
> After Halloween comes Thanksgiving and Christmas...and you know what that means. Family, fun and food, food, food!!!
Check out our page on tips for a successful weight watchers online!
Katie
Thanks for stopping by!!! We love your party!
Iris Gonzalez
It's very nice idea.
Katie
It is so easy and fun! Thanks for stopping by!
Katie
Thanks so much for stopping by!
Katie
They are super cheap and fun to make! Thanks for stopping by!
Katie
Thanks so much for including us!!!
Audrey
This is absolutely inspired! Congrats on your #HomeMattersParty feature.